Truth be told, I am not the chef of the family. Sure I can cook. Some things rather well. But if a recipe has more than 6 or 7 ingredients I generally move on to a different one. When I looked at the list of dishes, without opening the actual recipe, this one seemed easy. And it was. Once I bought all of the ingredients. And in the end I am glad I chose it. But of course when trying not to disappoint The Gourmet, I was a bit stressed to make sure everything was as perfect as possible.
In the end everything was great. But there was this moment:
I am a rule follower (at least when it comes to trying out a new recipe). I wanted Chinese Rice Wine. I did not want to settle for Sherry.
After making my husband run to 3 different stores he ended up at a liquor store buying dry sherry. And beer.
I am from a big city where when looking for specialty ingredients my biggest dilemma was choosing which Asian market to go to. Here in our little town, not so much. I am already having trouble finding the panang curry paste for our next Supper Club. Which is tomorrow. Cue panic.
Friday, February 24, 2012
Thursday, February 16, 2012
Stir-Fried Bok Choy and Lettuce with Mushrooms
I had never cooked bok choy before and I am so glad I chose this recipe because it is now a new regular for stir fry in our house!
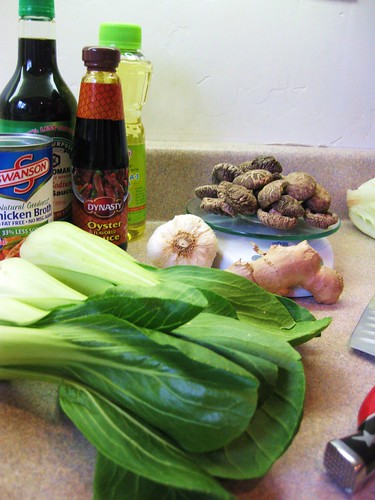
Gather the following items...
(I suggest having everything prepped and ready to go as it will go really fast)
1 cup boiling water
8 dried shiitake mushrooms (about 2 ounces)
2 tablespoons low-sodium soy sauce
1 tablespoon Shaoxing (Chinese rice wine) or dry sherry
1/2 teaspoon sugar
4 teaspoons canola oil, divided
1 teaspoon minced peeled ginger
1/2 cup fat-free, less-sodium chicken broth
2 tablespoons oyster sauce
1/2 teaspoon cornstarch
2 medium garlic cloves, thinly sliced
8 heads baby bok choy, halved lengthwise
1 medium head romaine lettuce, cut crosswise into 1-inch pieces (about 8 cups)
1. Combine 1 cup boiling water and shiitake mushrooms in a bowl. Cover and let stand 20 minutes. Drain mushrooms in a colander over a bowl, reserving liquid. Rinse mushrooms. Remove and discard stems; cut each cap into quarters. Set aside.
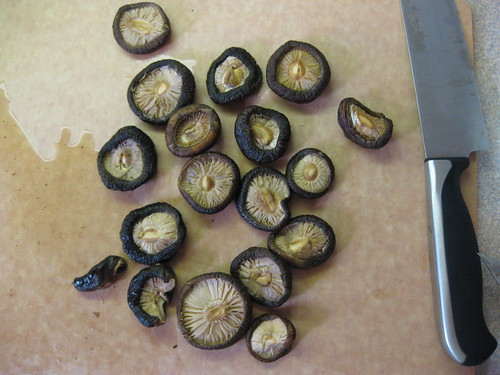
2. Combine soy sauce, wine, and sugar in a small bowl, stirring with a whisk.
3. Heat a small saucepan over medium-high heat. Add 1 teaspoon oil and ginger to pan; sauté 30 seconds. Add reserved mushrooms; sauté 1 minute. Add reserved mushroom liquid and broth; bring to a boil. Cover, reduce heat, and simmer 20 minutes.
4. Combine oyster sauce and cornstarch in a small bowl, stirring with a whisk; stir into mushroom mixture. Bring to a boil, stirring constantly. Cook 1 minute or until thickened. Remove from heat; keep warm.
5. Heat a wok or large skillet over high heat. Add remaining 1 tablespoon oil to pan. Add garlic; stir-fry 10 seconds. Add bok choy; stir-fry 2 minutes or until bok choy begins to soften. Add lettuce; stir-fry 2 minutes or until lettuce wilts. Stir in mushroom mixture and soy sauce mixture; cook 3 minutes or until bok choy is tender.
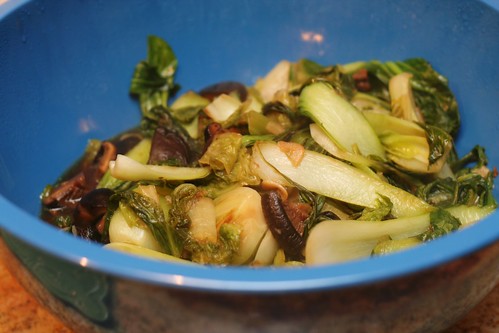
Enjoy!!
Behind the Scenes: Drying Tangerine Peel
Of all the stories to come out of our Chinese New Year recipes, one of the funniest was from our Hostess.
Tara's recipe for Salt Baked Chicken required dried tangerine peel.
An ingredient that caused the rest of us to back slowly away from the recipe.
Our stalwart leader, however, is also very inventive and decided to just peel and dry a tangerine peel in her oven.
Too bad she didn't tell her husband.
When she went to check on it, it was gone. Her husband had tossed it in the trash thinking it was, well, trash.
After she'd been drying it for hours.
Interestingly enough, not only was he still alive and well on the day of Supper Club, but she was able to dry more tangerine peel.
She's just that good.
Labels:
behind the scenes,
chicken,
Chinese food,
Chinese New Year,
Supper Club,
Tara
Tuesday, February 14, 2012
Pot Sticker Recipe
I have to admit I was
intimated making these pot stickers. But, once I got going it was extremely
easy! I will definitely be making these again for my family. I adapted my
recipe from Martha Stewart and since I am "the substitute" I modified it a bit.
1/2 cup finely chopped Napa cabbage – **I used bagged coleslaw
Coarse salt
6 ounces ground pork, not all lean
3 scallions, finely chopped
1 tablespoon finely chopped, peeled fresh ginger
1 teaspoon soy sauce
1 teaspoon toasted sesame oil – **I omitted this because I didn’t have any
Directions
1. In a medium bowl, toss cabbage with 1/2 teaspoon salt. Let stand 10 minutes.
5. In a 12-inch nonstick skillet with a tight-fitting lid, heat 1 tablespoon oil over medium-high heat. Add half the wontons and cook, turning once, until lightly browned, about 1 minute per side. Carefully add 1/2 cup water (oil may sputter), cover, and steam until translucent and just cooked through, 2 to 3 minutes. Repeat with remaining tablespoon oil and wontons.
Pot Sticker Recipe
I started by making the
filling….
Ingredients
1/2 cup finely chopped Napa cabbage – **I used bagged coleslaw
Coarse salt
6 ounces ground pork, not all lean
3 scallions, finely chopped
1 tablespoon finely chopped, peeled fresh ginger
1 teaspoon soy sauce
1 teaspoon toasted sesame oil – **I omitted this because I didn’t have any
Here are the ingredients... |
2. Wrap cabbage in a double layer of paper towels; firmly squeeze out excess liquid.
3. Return cabbage to bowl; add pork, scallions, ginger, soy sauce, and sesame oil. Mix well with a fork. Refrigerate leftover filling up to 2 days
Then I started on making the Pot Stickers themselves. This is the tricky part! Once you get the hang of it you will be on a roll. (No pun intended.) Biggest advice is to keep your fingers moist so the wonton paper does not stick to you. Also, don’t worry about the appearance they will still taste great! I used the sauce recipe but added a little sugar for sweetness.
Ingredients
24 rectangular (3 1/2-by-3-inch) or square wonton wrappers
1 recipe Wonton Filling
2 tablespoons vegetable oil
2 scallions, finely chopped (optional)
1/3 cup reduced-sodium soy sauce, for serving
Directions
1. Put a small amount of the wonton filling in the middle of the wrapper.
Then I started on making the Pot Stickers themselves. This is the tricky part! Once you get the hang of it you will be on a roll. (No pun intended.) Biggest advice is to keep your fingers moist so the wonton paper does not stick to you. Also, don’t worry about the appearance they will still taste great! I used the sauce recipe but added a little sugar for sweetness.
Ingredients
24 rectangular (3 1/2-by-3-inch) or square wonton wrappers
1 recipe Wonton Filling
2 tablespoons vegetable oil
2 scallions, finely chopped (optional)
1/3 cup reduced-sodium soy sauce, for serving
1. Put a small amount of the wonton filling in the middle of the wrapper.
2. Fold edges to form a triangle, pressing lightly.
3. Fold triangle corners inwards.
4. Transfer to an oiled plate, and cover with a damp towel to keep moist.
5. In a 12-inch nonstick skillet with a tight-fitting lid, heat 1 tablespoon oil over medium-high heat. Add half the wontons and cook, turning once, until lightly browned, about 1 minute per side. Carefully add 1/2 cup water (oil may sputter), cover, and steam until translucent and just cooked through, 2 to 3 minutes. Repeat with remaining tablespoon oil and wontons.
Labels:
appetizer,
Chinese food,
Chinese New Year,
Dolly,
easy,
fried,
January,
pork,
recipe
Monday, February 13, 2012
Mango Pudding Recipe
If you think of Bill Cosby and J-E-L-L-O when you hear the word "pudding," you and I have at least one thing in common. I will admit the thought of a cool creamy dairy mango concoction made me gag a little. I am a chocolate pudding girl, through and through. If it also makes you a little green for the same reason, think of it as a thick smoothie. After eating it, I've decided it would be very refreshing on a warm summers eve. Or after a heavy meal.
Gather together:
Preparation I am supposed to start this recipe by dicing fresh mangoes...but I bought frozen instead. I have not cooked long enough to truly appreciate dicing anything when you can buy it already diced.
1. Combine coarsely chopped mangoes and 1/4 cup water in a blender; process until smooth. Press puree through a fine sieve over a bowl; discard solids. (A fine sieve? This gal doesn't own one. So I just pureed it extra long until there were no visible fibers or chunks).
2. Bring 3/4 cup water to a boil in a medium saucepan. Add sugar to pan, stirring until dissolved. Remove from heat. Stir in the remaining 1 1/4 cups water. Sprinkle unflavored gelatin over water in the saucepan; let stand 1 minute.
3. Add the mango puree, stirring with a whisk. Pour the mixture evenly into each of 8 (6-ounce) ramekins or custard cups. (Your kidding? Ramekins or custard cups? Not in my kitchen. Poured the mixture into 2oz cups I use for my son's lunches)
4. Cover and chill overnight or until set. Top evenly with diced mango. (I skipped this part also. Frozen mango doesn't hold up the same as fresh...I didn't want little slimy bits on top.)
5. Place cream in a medium bowl; beat with a mixer at high speed until stiff peaks form. Serve with pudding. (COMPLETELY SPACED ON THIS ONE...served without whipped cream. Opps!)
Not too shabby for my first Six Kitchens attempt...
Mango Pudding Recipe
Gather together:
- 3 mangoes, peeled and divided (who are we kidding? I used a bag of frozen)
- 2 1/4 cups water, divided
- 1/2 cup sugar
- 1 tablespoon unflavored gelatin
- 1/4 cup whipping cream (or skip it, I completely forgot about this until I started writing out the recipe!)
Preparation I am supposed to start this recipe by dicing fresh mangoes...but I bought frozen instead. I have not cooked long enough to truly appreciate dicing anything when you can buy it already diced.
1. Combine coarsely chopped mangoes and 1/4 cup water in a blender; process until smooth. Press puree through a fine sieve over a bowl; discard solids. (A fine sieve? This gal doesn't own one. So I just pureed it extra long until there were no visible fibers or chunks).
2. Bring 3/4 cup water to a boil in a medium saucepan. Add sugar to pan, stirring until dissolved. Remove from heat. Stir in the remaining 1 1/4 cups water. Sprinkle unflavored gelatin over water in the saucepan; let stand 1 minute.
3. Add the mango puree, stirring with a whisk. Pour the mixture evenly into each of 8 (6-ounce) ramekins or custard cups. (Your kidding? Ramekins or custard cups? Not in my kitchen. Poured the mixture into 2oz cups I use for my son's lunches)
4. Cover and chill overnight or until set. Top evenly with diced mango. (I skipped this part also. Frozen mango doesn't hold up the same as fresh...I didn't want little slimy bits on top.)
5. Place cream in a medium bowl; beat with a mixer at high speed until stiff peaks form. Serve with pudding. (COMPLETELY SPACED ON THIS ONE...served without whipped cream. Opps!)
Not too shabby for my first Six Kitchens attempt...
Saturday, February 11, 2012
The Concept: Supper Club
When you Goggle "supper club" you learn the term refers to restaurants that offer a social atmosphere.
Wikipedia shares that
A supper club, in general, refers to a dining establishment that also functions as a social club. The term may describe different establishments depending on the region, but in general, supper clubs tend to present themselves as having a high-class image, even if the price is affordable to all.
Only part of that above description applies to what I thought I was getting myself into when Tara invited me participate, the social club part. I wanted to take a little bit of time to share with you the concept, and maybe you will be inspired to start one of your own.
Recipe for Supper Club, Six Kitchens-style
Frequency: Monthly
Participation: 6 families
Location: Rotates between the 6 families participating
Menu: Established by host family with the goal to pushes us out of our cooking comfort zone
Can I be honest? Anything that involves cooking is pretty much outside my comfort zone. However, for the more advanced culinary participants the comfort zone is a little more narrow. This involves trying not ingredients, spice profiles, and some other than I don't recall (and have not watched enough Food Network shows to pretend to understand. Spice profile? I take it that isn't the shape of the bottle the spices are packaged in ).
1. Once the host family develops the menu for the evening, the items are divided among the participating families.
This is how I ended up making Mango Pudding for our inaugural supper club. The menu was listed, everyone picked. And I got to choose between the Baked Salt Chicken, Shrimp, and Mango Pudding. Recall, cooking in general is outside my comfort zone? Though the recipe description for Baked Salt Chicken included the word "simple," the thought of cooking a WHOLE chicken and simple did not compute in this cook's mind. Mango Pudding, now that looked simple and something I and my four year old sous chef could pull off.
2. Each participating family prepares and brings their contribution to the meal on the scheduled night.
It's a potluck meal with a predetermined menu.
3. Everyone enjoys the food and the camaraderie.
Wikipedia shares that
A supper club, in general, refers to a dining establishment that also functions as a social club. The term may describe different establishments depending on the region, but in general, supper clubs tend to present themselves as having a high-class image, even if the price is affordable to all.
Only part of that above description applies to what I thought I was getting myself into when Tara invited me participate, the social club part. I wanted to take a little bit of time to share with you the concept, and maybe you will be inspired to start one of your own.
Recipe for Supper Club, Six Kitchens-style
Frequency: Monthly
Participation: 6 families
Location: Rotates between the 6 families participating
Menu: Established by host family with the goal to pushes us out of our cooking comfort zone
Can I be honest? Anything that involves cooking is pretty much outside my comfort zone. However, for the more advanced culinary participants the comfort zone is a little more narrow. This involves trying not ingredients, spice profiles, and some other than I don't recall (and have not watched enough Food Network shows to pretend to understand. Spice profile? I take it that isn't the shape of the bottle the spices are packaged in ).
1. Once the host family develops the menu for the evening, the items are divided among the participating families.
2. Each participating family prepares and brings their contribution to the meal on the scheduled night.
It's a potluck meal with a predetermined menu.
3. Everyone enjoys the food and the camaraderie.
Monday, February 6, 2012
Salt Baked Chicken Recipe
In spite of the name of this dish, it's really not salty. Just juicy and delicious.
You will need:
2 1/2 c. boiling water
1 (1 x 2–inch) strip dried tangerine peel
1 (4.5- to 5-pound) roasting chicken
5 1/2 tsp coarse sea salt, divided
1/4 cup finely chopped shallots
2 tablespoons minced ginger
2 tablespoons Shaoxing (Chinese rice wine) or dry sherry
1 tablespoon low-sodium soy sauce
1 1/2 teaspoons sesame oil
2 green onions, cut into 1-inch pieces
1. Combine 2 1/2 cups boiling water and tangerine peel in a bowl; cover and let stand 30 minutes. Drain in a colander over a bowl, reserving liquid.
2. Remove and discard giblets and neck from chicken. Trim excess fat. Starting at neck cavity, loosen skin from breast and drumsticks by inserting fingers, gently pushing between skin and meat. Rub 1 tablespoon salt under skin; let stand 5 minutes. Rinse chicken under cold water; pat dry with paper towels. Place chicken on the rack of a roasting pan; let stand 1 hour at room temperature.
3. Preheat oven to 425°.
4. Transfer chicken to a work surface. Combine remaining 2 1/2 teaspoons salt, shallots, ginger, wine, soy sauce, oil, and honey in a small bowl. Rub 3 tablespoons shallot mixture inside cavity of chicken. Place onions and tangerine peel inside cavity. Rub remaining shallot mixture under loosened skin.
5. Place chicken, breast side up, on the rack of a roasting pan coated with cooking spray. Pour reserved tangerine soaking liquid into a shallow roasting pan; place rack in pan. Bake at 425° for 1 hour or until a meat thermometer registers 165° and skin has turned a dark golden brown color. Let stand 15 minutes. Discard skin, and slice.
Enjoy!
Salt Baked Chicken
You will need:
2 1/2 c. boiling water
1 (1 x 2–inch) strip dried tangerine peel
1 (4.5- to 5-pound) roasting chicken
5 1/2 tsp coarse sea salt, divided
1/4 cup finely chopped shallots
2 tablespoons minced ginger
2 tablespoons Shaoxing (Chinese rice wine) or dry sherry
1 tablespoon low-sodium soy sauce
1 1/2 teaspoons sesame oil
2 green onions, cut into 1-inch pieces
1. Combine 2 1/2 cups boiling water and tangerine peel in a bowl; cover and let stand 30 minutes. Drain in a colander over a bowl, reserving liquid.
2. Remove and discard giblets and neck from chicken. Trim excess fat. Starting at neck cavity, loosen skin from breast and drumsticks by inserting fingers, gently pushing between skin and meat. Rub 1 tablespoon salt under skin; let stand 5 minutes. Rinse chicken under cold water; pat dry with paper towels. Place chicken on the rack of a roasting pan; let stand 1 hour at room temperature.
3. Preheat oven to 425°.
4. Transfer chicken to a work surface. Combine remaining 2 1/2 teaspoons salt, shallots, ginger, wine, soy sauce, oil, and honey in a small bowl. Rub 3 tablespoons shallot mixture inside cavity of chicken. Place onions and tangerine peel inside cavity. Rub remaining shallot mixture under loosened skin.
Enjoy!
Labels:
chicken,
Chinese food,
Chinese New Year,
cooking,
January,
low fat,
main dish,
recipe,
Tara
Friday, February 3, 2012
Behind the Scenes: Stir Fry Shrimp
I don't know very many people who don't love shrimp.
Myself included.
But there are some people who can't eat shrimp without a trip to the emergency room.
Myself included.
So when Tara's menu came out complete with Stir Fry Shrimp with Garlic and Chile Sauce, my first thought was, "Good GOD, but that sounds amazing."
My second thought was, "Is my epi pen expired."
I've been known to swell up like a balloon from the slightest cross-contamination. The thought of ten adults and nine children dishing up their food with big spoons and not paying attention to minor details like shrimp juice, made me a little nervous.
Until I showed up at Tara's house.
I should have known that Tara - one of the most organized people I know - would have it all in hand.
Behold: The Shrimp Spoon
Wednesday, February 1, 2012
Stir-Fried Shrimp with Garlic and Chile Sauce Recipe
This flavorful shrimp recipe is not only melt-in-your mouth delicious, but healthy as well. Taken from the Cooking Light website, it combines ginger and cilantro with create a savory dish that's, from all accounts, completely addictive.
Stir-Fried Shrimp with Garlic and Chile Sauce
You'll need:
1/2 c. fat-free, chicken broth
2 tsp cornstarch
1 tsp sugar
2 tsp Shaoxing (Chinese rice wine) or dry sherry
2 tsp low-sodium soy sauce
1/4 tsp white pepper
1 tsp canola oil
1 1/2 pounds large shrimp, peeled and deveined
2 T minced garlic
1 1/2 tsp minced peeled fresh ginger
2 jalapeño peppers, seeded and finely chopped
1/2 c sliced green onions
1/2 tsp dark sesame oil
Cilantro sprigs (optional)
This cooks fairly fast, so I'd suggest prepping all of your ingredients before you start.
1. Combine first 6 ingredients in a small bowl, stirring with a whisk
2. Heat a wok or large skillet over high heat. Add canola oil to pan. Add shrimp to pan and stir-fry 1 minute or until shrimp begin to turn pink.
3. Add garlic, ginger, and jalapeño; stir-fry 1 minute.
4. Stir in broth mixture; cook 1 minute or until shrimp are done and sauce is thickened, stirring constantly.
5. Remove from heat; stir in onions and sesame oil. Garnish with cilantro sprigs, if desired.
Enjoy!
Labels:
appetizer,
Chinese food,
Chinese New Year,
January,
recipe,
shrimp,
side dish,
Tara
Behind the Scenes: Sweet and Sour Chicken
When I picked the Sweet and Sour Chicken recipe I did so for one reason and one reason only - it was the only item that looked vaguely familiar besides the pot stickers and Dolly had already called dibs on that one.
But I had a big problem with this recipe.
First, I can't stand touching raw meat. It's weird. I know. And it's also 90% of the reason why I'm a flexitarian. Touching it makes me shudder and break out in a cold sweat. I gag. I actually gag.
I've figured out a few ways to cope with this weirdness - and I realize it's weird. I use tongs - a lot. I buy my meat pre-cooked. I bribe friends and family to do it for me.
The Sweet and Sour Chicken required the pieces to be cut up into 1/2" chunks and cooked in spices and oil. I was nervous that my typical method of cooking a chicken breast whole and then cutting it up would diminish the taste. So I did what any meat-a-phobe would do.
I asked my butcher to cut it for me.
Albertson's has a cleanly lettered sign saying their butcher shop will do any cut of meat. So it made sense to me that they'd cut my chicken.
I made my request and stood there while the butcher's stood agog.
"You want me to cut the chicken into cubes?"
"Yeah. The need to be 1/2". And I need two pounds."
"You just want it cut up."
"Yep." I felt my face turn red.
"If you don't mind my asking, why? Most people just cut it up at home."
"I don't like touching raw meat," I said to the butcher, a man with an apron smeared with blood.
"Okay," he nodded slowly. "It'll just be a minute."
I have to tell you, it made prepping my dish much easier. All I had to do was open the package and dump the chicken in with the oils and spices. I think I'll be asking my butcher to chop up chicken more often.
Subscribe to:
Posts (Atom)