Showing posts with label January. Show all posts

Thursday, February 14, 2013

Farro Risotto

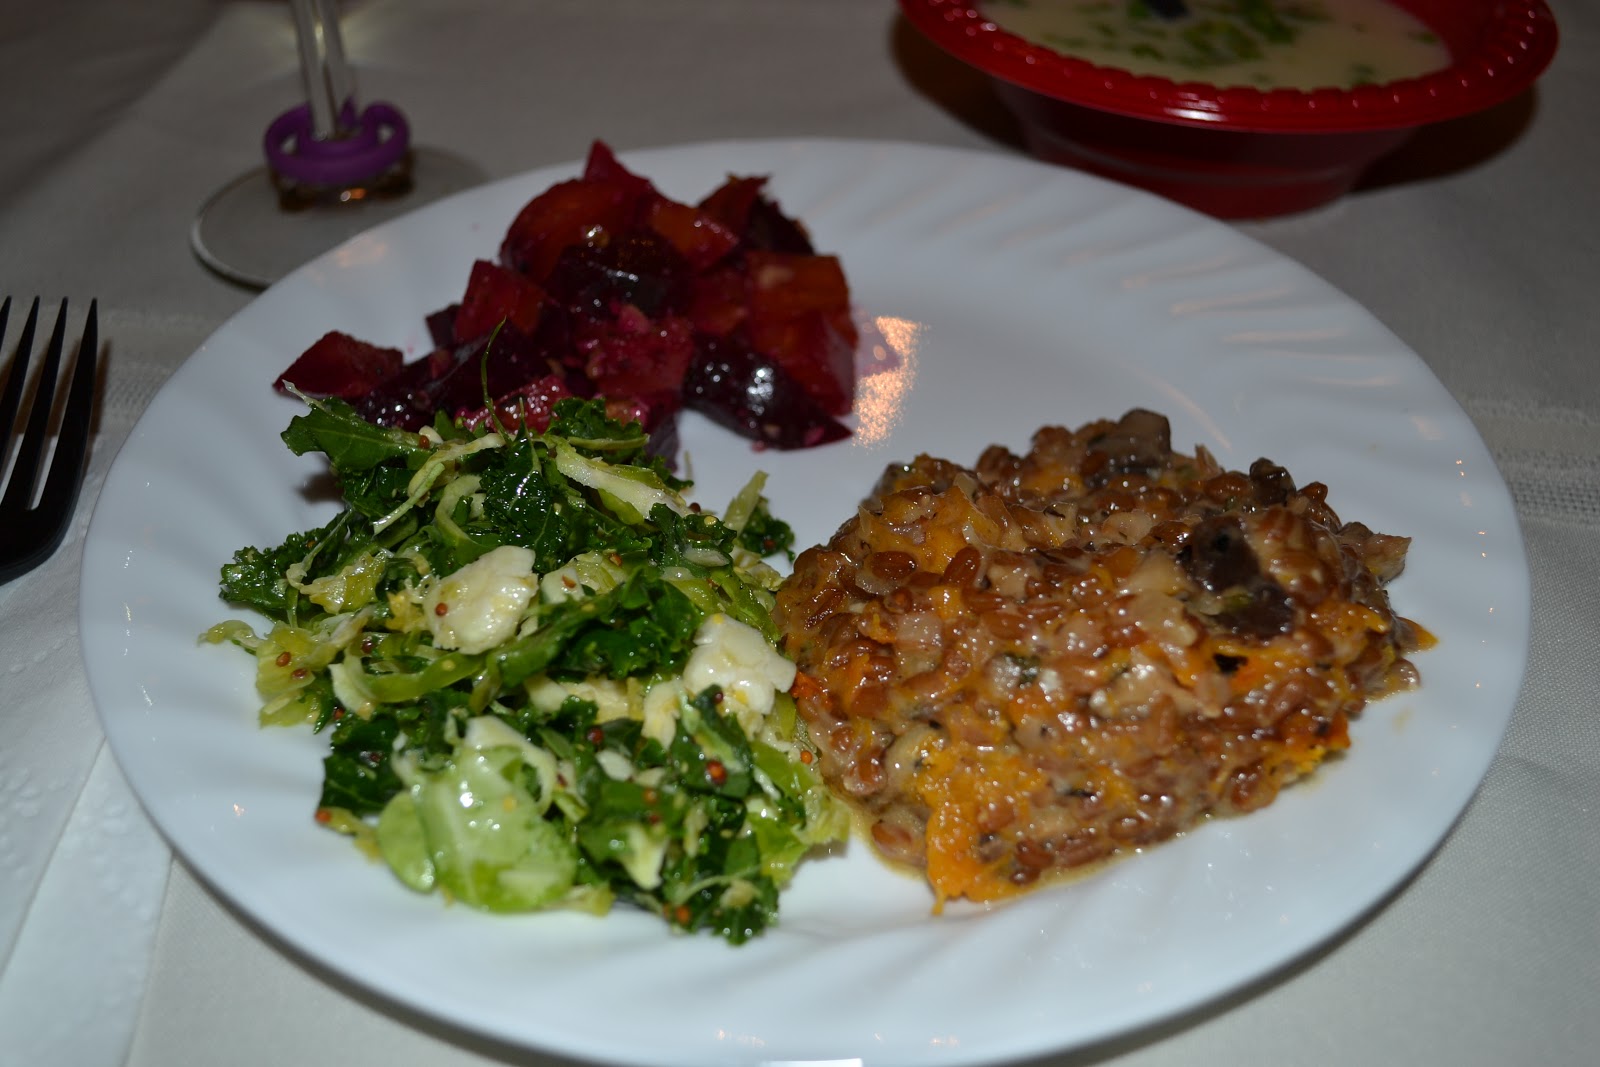
The most challenging part of this wonderful dish...locating the correct farro. Who knew that would be such a scavenger hunt. Tara was able to locate the ten-minute version, but that would be akin to using instant oatmeal when cooking oats were called for.  She was not able to locate pearled or semi pearled as the recipe called for and had to settle for regular. As such, it was a good thing she started the recipe early. She had intended to use the additional 90 minutes to visit with friends before joining up with us at Supper Club. Instead she spent it waiting for the farro to cook. Moral of the story, if you can not locate pearl or semi-pearl farro, give yourself plenty of time. 

This dish was well balanced. As not a huge fan of mushrooms, I was delighted that they were not a huge player in the flavor profile. the butternut squash provided substance without too much sweetness. Tara doubled the recipe and by the end of the evening went home with an empty container. We licked it clean.

Farro Risotto


INGREDIENTS


2½ cups butternut squash, cut into ½-inch cubes
3 tbsp. olive oil
1 tbsp. plus 1 tsp. sage, chopped
1 cup farro (pearled or semi pearled)
3 tbsp. butter
4 shallots, minced
2 cloves garlic, minced
1 sprig thyme
½ cup white wine
1 cup chicken or vegetable stock
2 cups shiitake mushrooms, chopped
1½ cups shredded parmesan
1 tbsp. crème fraiche

INSTRUCTIONS

1. Heat the oven to 400°F. Toss the squash with 2 tablespoons olive oil and season with salt and pepper. Place on a parchment-lined baking sheet and roast for 25–30 minutes until the edges are browned and crisp. Remove from oven and immediately sprinkle 1 tablespoon sage over the still hot squash.

2. Meanwhile, bring 4 cups of water to a boil over medium heat. Stir in your farro and cook for 15 minutes. Drain, reserving 1 cup of the cooking liquid, and set aside.

3. In a 4 quart pan, heat the remaining 1 tablespoon olive oil over medium heat. Add in the chopped shiitakes and sauté, about 3 minutes, remove from pan and set aside.

4. Melt the butter in the same pan over medium heat. Add in the shallots, garlic and thyme. Let cook until the shallots become slightly caramelized, about 3 minutes.

6. Add the farro and stir, coating each kernel with butter. Add in the white wine and let simmer off.

5. Turn the heat down to low and begin alternately adding in the chicken stock and the farro cooking liquid, a ¼ cup at a time, stirring continuously with each addition. Do not add more liquid until the previous ¼ cup has been completely absorbed by the farro. This process should take about 25–30 minutes. After the last addition, stir until about ⅔ of the liquid has been absorbed, and add in the mushrooms and roasted squash.

6. Fold in the cheese and stir until just melted.

7. Fold in the crème fraiche and remaining chopped sage for garnish, season with salt and pepper.


A double batch...and we licked the bowl clean!


Thursday, February 7, 2013

Beet and Walnut Salad


This roasted beet and walnut salad was a surprise hit with a slightly sweet flavor enhanced by the crunch of the nuts and the tang of blue cheese. The kids poked at it suspiciously while the adults went back for seconds and thirds. It's the perfect chilled accompaniment to the warm dishes sharing the plate. Just remember to serve with the blue cheese...it wasn't until we were putting the few left overs back in the fridge did we realize we forgot the wedge in there!! And after Anne specifically hunted the cheese shelf for non-crumbly blue cheese for the perfect wedge.

Anne found these beautiful beets at the local food co-op, but this time of year, Farmers Markets are filled with these little gems that are all too often only served pickled.


Roasted Beet and Walnut Salad


INGREDIENTS
2 garlic cloves, peeled and minced
4 tbsp. red wine vinegar
4 tbsp. walnut oil
12 medium cooled Roasted Beets, peeled and cubed
¼ cup chopped toasted walnuts
Salt and freshly ground black pepper
wedges of blue cheese


INSTRUCTIONS

1. Put garlic, vinegar, walnut oil, beets, walnuts, and salt and pepper to taste into a bowl and toss well. (Anne roasted the beets the evening before to ensure they were cooled in time)
2. Serve with wedges of blue cheese on the side.


Tuesday, February 5, 2013

Leek and Potato Soup

This hearty dished warmed up the coldest of nights. With temperatures dipping to record lows in our neck of the woods, we were all happy to have this creamy soup on the menu. While the kids weren't too fond of the chopped chives, the adults all agreed it added just the right amount of zip and texture to a surprisingly low fat soup. The odd bit of this recipe is that is gives you the option of either mashing the vegetables with a fork or passing them through a food mill. This two techniques will results in two vastly different textures. If you like your soup on the chunky side, mash with a fork. If you prefer creamy and smooth, use an immersion blender as Sarah did.

Leek and Potato Soup Recipe


INGREDIENTS
3 russet potatoes, peeled and sliced or diced
5 leeks, trimmed, cleaned, then thinly sliced, including the tender green part
Salt
4–6 tbsp. whipping cream
2–3 tbsp. minced fresh parsley or chives


INSTRUCTIONS

1. Put potatoes, leeks, salt to taste, and 8 cups of water in a large saucepan over medium heat and simmer, partially covered, until vegetables are tender, 40–50 minutes.

2. Mash vegetables in the soup with a fork, or pass the soup through a food mill. Correct seasoning with salt.

3. Off heat, just before serving, stir in the cream by spoonfuls.

4. Pour soup into a tureen or soup bowls and decorate with the herbs.

5. Add a little freshly ground white pepper, if you like.

Thursday, January 31, 2013

Shredded Brussels Sprouts and Kale Salad

The whole group is a fan of Brussels sprouts and kale in general, especially this time of year when both are in large supply at Farmers Markets. This dish, however, was a surprise. Typically, we roast, bake, or even grill the little green cabbages  I did a double take when I realized they were thinly sliced and raw. It's a simple recipe that highlights the slightly bitter kale and the crunch of the Brussels sprouts. Jen used less kale than the recipe calls for to even out the Brussels sprouts to kale ratio.

Shredded Brussels Sprouts and Kale Salad Recipe


INGREDIENTS

1 lb. Brussels sprouts
1 bunch kale, stems removed and finely chopped
2 tbsp. whole-grain mustard
4 tbsp. fresh lemon juice
½ cup extra-virgin olive oil
Kosher salt and fresh-ground black pepper


INSTRUCTIONS

1. Trim the woody ends off the Brussels sprouts. In a food processor fitted with the shredding disc, process sprouts until uniformly shredded. (If you don't have a food processor, you can slice the sprouts using a mandolin.)

2. In a large bowl, whisk together the mustard, lemon juice, and olive oil. Add the kale and shredded Brussels sprouts and toss to coat. Season to taste with salt and pepper.

Tuesday, January 29, 2013

Gougères (Cheese Puffs)

These little cheese puffs were more puff than cheese. With a consistency and taste similar to cheese straws, the kids ate them faster than they could come out of the oven. They reminded me of eclairs with the filling (which is the only reason I for one enjoy an eclair). They left you longing for something filling the air-pocket in the center. This did not stop the kids, but I am not sure these will be gracing my oven again any time soon.

Gougères (Cheese Puffs) Recipe


INGREDIENTS
½ cup milk
8 tbsp. unsalted butter, cubed
½ tsp. kosher salt
1 cup flour
4 eggs, at room temperature
6 oz. Gruyère cheese, grated


INSTRUCTIONS
1. Heat oven to 425°.
2. Bring milk, butter, salt, and ½ cup water to a boil in a 4-qt. saucepan over high heat.
3. Add flour; stir until dough forms.
4. Reduce heat to medium; cook, stirring dough constantly with a wooden spoon, until slightly dried, about 2 minutes.
5. Transfer to a bowl; using a hand mixer, beat in 1 egg until smooth.
6. Repeat with remaining eggs, beating each one at a time, until dough is smooth; stir in cheese.
7. Using a large tablespoon, drop balls of dough onto parchment paper-lined baking sheets.
8. Place in oven; reduce temperature to 375°.
9. Bake until golden brown, about 30 minutes.


Friday, January 25, 2013

Torta di Sant'Antonio


When I was assigned to bring a pie, saying it pushed my culinary boundaries is an understatement. This traditional Italian torte was an odd combination of rich pastry and wine soaked apples. The sweetness of the wine and the zest of the orange gave it a distinctly mulled flavor that was cut by the flaky crust and creamy whipped cream.

Torta di Sant'Antonio Recipe


INGREDIENTS
2 cups flour7 tbsp. sugar, plus more1 tsp. baking soda6 tbsp. unsalted butter, cut into ½" cubes, chilled¼ cup milk2 egg yolks1 ¼ cups red wine¼ tsp. ground cinnamon4 Granny Smith apples, peeled, cored, and thinly sliced¼ tsp. kosher saltZest of 1 orange1 egg white, lightly beaten

INSTRUCTIONS

1. In a bowl, whisk together flour, 1 tbsp. sugar, and baking soda; rub butter into flour until pea-size crumbles form. In a bowl, whisk together milk and yolks; mix with a fork into flour. Transfer to a floured surface; knead into a ball; wrap in plastic wrap and chill for 1 hour.

2. Bring remaining sugar, wine, cinnamon, apples, salt, and orange zest to a boil in a 4-qt.pan over medium-high heat. Reduce heat to medium-low; simmer until wine is reduced to a syrup, 25–30 minutes; let cool.

3. Heat oven to 375°. Transfer dough to a floured surface; roll out to ⅛" thickness. Transfer dough to an 11" tart pan with a removable bottom; press into bottom and sides. Trim dough edges; reserve scraps. Transfer apple mixture to pan; fold dough sides over edges. (To make garnish: roll dough scraps to ⅛" thickness. Cut out leaf and grape shapes; arrange on top.) Brush dough with egg white; sprinkle with sugar. Bake until golden, 25–30 minutes.


Tuesday, January 22, 2013

Twelve Mile Limit Cocktail

When Saveur suggested this potent cocktail as a possible pairing for our Harvest Dinner menu, we practically dared each other to drink it. Filled with a variety of alcohols with only lemon juice and grenadine to cut the flavor, we were surprised at how delicious it tasted. But we all agreed next time we'd add seltzer water to cut it just a bit more.

 Twelve Mile Limit Cocktail


INGREDIENTS:

1 oz. silver rum
½ oz. rye whiskey
½ oz. brandy
½ oz. grenadine
½ oz. fresh lemon juice
1 lemon twist, to garnish

INSTRUCTIONS:

Combine rum, whiskey, brandy, grenadine, and juice in a cocktail shaker filled with ice; cover and shake until chilled, about 15 seconds. Strain into a chilled highball glass and top with lemon twist.


Thursday, January 17, 2013

January 2013: A Vegetarian Harvest


The Hostess
The Rookie


The Theme
A Vegetarian Harvest


The Menu
Appetizer: Gougères
Main Dish: Farro Risotto and Leek and Potato Soup
 Side Dishes: Marinated Beets With Walnuts and Blue Cheese
Shredded Brussels Sprouts and Kale Salad
 Dessert:Torta di Sant'Antonio with Freshly Whipped Cream
Drink: Twelve Mile Limit Cocktail

Background

It was a cold and rainy night in December when I picked out this menu. Doesn't that type of weather make you want to curl up with a bowl of thick soup by a crackling fire? 

I didn't tell my boyfriend there would be no meat until our dinner guests had already arrived and were bringing their dishes into the kitchen. He was...less than excited. I think only one of the guys was "okay" with the idea. The other two filled up on meat products earlier in the day. Honestly, I didn't miss the meat. The farro risotto and the soup were very filling. The salads were a perfect accompaniment. The ladies began by toasting to our first dinner of Supper Club 2.0 with glasses of Twelve Mile Limit cocktails (the recipe described it as "potent" and I can confirm it is). Gougères started the evening's menu off as described on Saveur's website, but you'll have to check out that post for the final verdict.

After the men were fed and the children were tucked in a back bedroom with a few packages of glow sticks to entertain them, the ladies ended the meal in the kitchen with a slice of Torta di Sant'Antonio (a story all it's own)  and a dallop of freshly whipped cream. Perfection!


Monday, January 14, 2013

2012 ends and 2013 begins

2012 has closed out and I am happy to report Supper Club was a success. This blog, well...not so much. Though Six Kitchens met eleven months out of twelve, we did not find the time to share the recipes and stories with you all. The "golden wisk" goes to "The Writer" for attending all eleven dinner.

Like every year, there was lots of change. The typical trials and tribulations that occur when and group of six women come together.

I am so glad we made it through the year and we enjoyed it so much, we have decided to continue this journey into 2013. However, 2013 will see a slight change.

In 2012, we tried the concept of pushing ourselves outside our cooking comfort zones. Let's be honest, sometimes we only nudged ourselves beyond that line. The hostess for the month picked a theme and various dishes from the web and away we went.

In 2013, the menus will be more structured. We are selecting menus from Saveur. Good golly, so many yummy choices. I had the daunting task of selecting January's menu. First one out of the gate and so many ones to chose from. It was a cold rainy evening when I was looking through them. The type of evening when comfort food is what you want. Warm thick stew. Roasted vegetables. Steamy rice. That is what was calling my name and tempting my palate when I browsed page after page of menus. Stay tuned for January's menu to see what I picked and how the recipes turned out.

Thanks for joining us on our culinary journey as begin Six Kitchens Supper Club 2.0

Happy New Year!!


Friday, February 24, 2012

Behind the Scenes: Stir-Fried Bok Choy and Lettuce with Mushrooms

Truth be told, I am not the chef of the family. Sure I can cook. Some things rather well. But if a recipe has more than 6 or 7 ingredients I generally move on to a different one. When I looked at the list of dishes, without opening the actual recipe, this one seemed easy. And it was. Once I bought all of the ingredients. And in the end I am glad I chose it. But of course when trying not to disappoint The Gourmet, I was a bit stressed to make sure everything was as perfect as possible.

In the end everything was great. But there was this moment:


I am a rule follower (at least when it comes to trying out a new recipe). I wanted Chinese Rice Wine. I did not want to settle for Sherry.

After making my husband run to 3 different stores he ended up at a liquor store buying dry sherry. And beer.

I am from a big city where when looking for specialty ingredients my biggest dilemma was choosing which Asian market to go to. Here in our little town, not so much. I am already having trouble finding the panang curry paste for our next Supper Club. Which is tomorrow. Cue panic.

Thursday, February 16, 2012

Stir-Fried Bok Choy and Lettuce with Mushrooms

I had never cooked bok choy before and I am so glad I chose this recipe because it is now a new regular for stir fry in our house!

IMG_0135

Gather the following items...
(I suggest having everything prepped and ready to go as it will go really fast)

1 cup boiling water
8 dried shiitake mushrooms (about 2 ounces)

2 tablespoons low-sodium soy sauce
1 tablespoon Shaoxing (Chinese rice wine) or dry sherry
1/2 teaspoon sugar

4 teaspoons canola oil, divided
1 teaspoon minced peeled ginger
1/2 cup fat-free, less-sodium chicken broth

2 tablespoons oyster sauce
1/2 teaspoon cornstarch

2 medium garlic cloves, thinly sliced
8 heads baby bok choy, halved lengthwise
1 medium head romaine lettuce, cut crosswise into 1-inch pieces (about 8 cups)


1. Combine 1 cup boiling water and shiitake mushrooms in a bowl. Cover and let stand 20 minutes. Drain mushrooms in a colander over a bowl, reserving liquid. Rinse mushrooms. Remove and discard stems; cut each cap into quarters. Set aside.

IMG_0136

2. Combine soy sauce, wine, and sugar in a small bowl, stirring with a whisk.

3. Heat a small saucepan over medium-high heat. Add 1 teaspoon oil and ginger to pan; sauté 30 seconds. Add reserved mushrooms; sauté 1 minute. Add reserved mushroom liquid and broth; bring to a boil. Cover, reduce heat, and simmer 20 minutes.

4. Combine oyster sauce and cornstarch in a small bowl, stirring with a whisk; stir into mushroom mixture. Bring to a boil, stirring constantly. Cook 1 minute or until thickened. Remove from heat; keep warm.

5. Heat a wok or large skillet over high heat. Add remaining 1 tablespoon oil to pan. Add garlic; stir-fry 10 seconds. Add bok choy; stir-fry 2 minutes or until bok choy begins to soften. Add lettuce; stir-fry 2 minutes or until lettuce wilts. Stir in mushroom mixture and soy sauce mixture; cook 3 minutes or until bok choy is tender.

021-1

Enjoy!!

Tuesday, February 14, 2012

Pot Sticker Recipe

I have to admit I was intimated making these pot stickers. But, once I got going it was extremely easy! I will definitely be making these again for my family. I adapted my recipe from Martha Stewart and since I am "the substitute" I modified it a bit.


Pot Sticker Recipe

I started by making the filling….

Ingredients

1/2 cup finely chopped Napa cabbage – **I used bagged coleslaw
Coarse salt
6 ounces ground pork, not all lean
3 scallions, finely chopped
1 tablespoon finely chopped, peeled fresh ginger
1 teaspoon soy sauce
1 teaspoon toasted sesame oil – **I omitted this because I didn’t have any


Here are the ingredients...
Directions 


1.  In a medium bowl, toss cabbage with 1/2 teaspoon salt. Let stand 10 minutes.

2.  Wrap cabbage in a double layer of paper towels; firmly squeeze out excess liquid. 

3.  Return cabbage to bowl; add pork, scallions, ginger, soy sauce, and sesame oil. Mix well with a fork. Refrigerate leftover filling up to 2 days


Then I started on making the Pot Stickers themselves. This is the tricky part! Once you get the hang of it you will be on a roll. (No pun intended.) Biggest advice is to keep your fingers moist so the wonton paper does not stick to you. Also, don’t worry about the appearance they will still taste great! I used the sauce recipe but added a little sugar for sweetness.


Ingredients

24 rectangular (3 1/2-by-3-inch) or square wonton wrappers
1 recipe Wonton Filling
2 tablespoons vegetable oil
2 scallions, finely chopped (optional)
1/3 cup reduced-sodium soy sauce, for serving
Directions


1. Put a small amount of the wonton filling in the middle of the wrapper.


2. Fold edges to form a triangle, pressing lightly.


3.  Fold triangle corners inwards.


4. Transfer to an oiled plate, and cover with a damp towel to keep moist.


5.  In a 12-inch nonstick skillet with a tight-fitting lid, heat 1 tablespoon oil over medium-high heat. Add half the wontons and cook, turning once, until lightly browned, about 1 minute per side. Carefully add 1/2 cup water (oil may sputter), cover, and steam until translucent and just cooked through, 2 to 3 minutes. Repeat with remaining tablespoon oil and wontons. 


6.  Sprinkle pot stickers with scallions, if using, and serve with soy sauce.

Of course we sampled just to make sure they tasted ok! They were amazing! Thank goodness there was no need to stop by the store for frozen ones on the way over! Enjoy!
xoxo – Dolly
“The Substitute “

Monday, February 13, 2012

Mango Pudding Recipe

If you think of Bill Cosby and J-E-L-L-O when you hear the word "pudding," you and I have at least one thing in common. I will admit the thought of a cool creamy dairy mango concoction made me gag a little. I am a chocolate pudding girl, through and through. If it also makes you a little green for the same reason, think of it as a thick smoothie. After eating it, I've decided it would be very refreshing on a warm summers eve. Or after a heavy meal.
 Mango Pudding Recipe

Gather together:
  • 3 mangoes, peeled and divided (who are we kidding? I used a bag of frozen)
  • 2 1/4 cups water, divided
  • 1/2 cup sugar
  • 1 tablespoon unflavored gelatin
  • 1/4 cup whipping cream (or skip it, I completely forgot about this until I started writing out the recipe!)

Preparation I am supposed to start this recipe by dicing fresh mangoes...but I bought frozen instead. I have not cooked long enough to truly appreciate dicing anything when you can buy it already diced. 

1. Combine coarsely chopped mangoes and 1/4 cup water in a blender; process until smooth. Press puree through a fine sieve over a bowl; discard solids. (A fine sieve? This gal doesn't own one. So I just pureed it extra long until there were no visible fibers or chunks). 

2. Bring 3/4 cup water to a boil in a medium saucepan. Add sugar to pan, stirring until dissolved. Remove from heat. Stir in the remaining 1 1/4 cups water. Sprinkle unflavored gelatin over water in the saucepan; let stand 1 minute.

3. Add the mango puree, stirring with a whisk. Pour the mixture evenly into each of 8 (6-ounce) ramekins or custard cups. (Your kidding? Ramekins or custard cups? Not in my kitchen. Poured the mixture into 2oz cups I use for my son's lunches)

4. Cover and chill overnight or until set. Top evenly with diced mango. (I skipped this part also. Frozen mango doesn't hold up the same as fresh...I didn't want little slimy bits on top.)

5. Place cream in a medium bowl; beat with a mixer at high speed until stiff peaks form. Serve with pudding. (COMPLETELY SPACED ON THIS ONE...served without whipped cream. Opps!)
  

Not too shabby for my first Six Kitchens attempt...

Monday, February 6, 2012

Salt Baked Chicken Recipe

In spite of the name of this dish, it's really not salty. Just juicy and delicious.

Salt Baked Chicken


You will need:

2 1/2 c. boiling water
1 (1 x 2–inch) strip dried tangerine peel
1 (4.5- to 5-pound) roasting chicken
5 1/2 tsp coarse sea salt, divided
1/4 cup finely chopped shallots
2 tablespoons minced ginger
2 tablespoons Shaoxing (Chinese rice wine) or dry sherry
1 tablespoon low-sodium soy sauce
1 1/2 teaspoons sesame oil
2 green onions, cut into 1-inch pieces

1. Combine 2 1/2 cups boiling water and tangerine peel in a bowl; cover and let stand 30 minutes. Drain in a colander over a bowl, reserving liquid.

2. Remove and discard giblets and neck from chicken. Trim excess fat. Starting at neck cavity, loosen skin from breast and drumsticks by inserting fingers, gently pushing between skin and meat. Rub 1 tablespoon salt under skin; let stand 5 minutes. Rinse chicken under cold water; pat dry with paper towels. Place chicken on the rack of a roasting pan; let stand 1 hour at room temperature.


3. Preheat oven to 425°.

4. Transfer chicken to a work surface. Combine remaining 2 1/2 teaspoons salt, shallots, ginger, wine, soy sauce, oil, and honey in a small bowl. Rub 3 tablespoons shallot mixture inside cavity of chicken. Place onions and tangerine peel inside cavity. Rub remaining shallot mixture under loosened skin.

5. Place chicken, breast side up, on the rack of a roasting pan coated with cooking spray. Pour reserved tangerine soaking liquid into a shallow roasting pan; place rack in pan. Bake at 425° for 1 hour or until a meat thermometer registers 165° and skin has turned a dark golden brown color. Let stand 15 minutes. Discard skin, and slice.

Enjoy!


Friday, February 3, 2012

Behind the Scenes: Stir Fry Shrimp


I don't know very many people who don't love shrimp.

Myself included.

But there are some people who can't eat shrimp without a trip to the emergency room.

Myself included.

So when Tara's menu came out complete with Stir Fry Shrimp with Garlic and Chile Sauce, my first thought was, "Good GOD, but that sounds amazing."

My second thought was, "Is my epi pen expired."

I've been known to swell up like a balloon from the slightest cross-contamination. The thought of ten adults and nine children dishing up their food with big spoons and not paying attention to minor details like shrimp juice, made me a little nervous.

Until I showed up at Tara's house.

I should have known that Tara - one of the most organized people I know - would have it all in hand.

Behold: The Shrimp Spoon

Wednesday, February 1, 2012

Stir-Fried Shrimp with Garlic and Chile Sauce Recipe

This flavorful shrimp recipe is not only melt-in-your mouth delicious, but healthy as well. Taken from the Cooking Light website, it combines ginger and cilantro with create a savory dish that's, from all accounts, completely addictive.

Stir-Fried Shrimp with Garlic and Chile Sauce


You'll need:

1/2 c. fat-free, chicken broth
2 tsp cornstarch
1 tsp sugar
2 tsp Shaoxing (Chinese rice wine) or dry sherry
2 tsp low-sodium soy sauce
1/4 tsp white pepper
1 tsp canola oil

1 1/2 pounds large shrimp, peeled and deveined

2 T minced garlic
1 1/2 tsp minced peeled fresh ginger
2 jalapeño peppers, seeded and finely chopped
1/2 c sliced green onions
1/2 tsp dark sesame oil
Cilantro sprigs (optional)

This cooks fairly fast, so I'd suggest prepping all of your ingredients before you start.


1. Combine first 6 ingredients in a small bowl, stirring with a whisk


2. Heat a wok or large skillet over high heat. Add canola oil to pan. Add shrimp to pan and stir-fry 1 minute or until shrimp begin to turn pink.


3. Add garlic, ginger, and jalapeño; stir-fry 1 minute.

4. Stir in broth mixture; cook 1 minute or until shrimp are done and sauce is thickened, stirring constantly.

5. Remove from heat; stir in onions and sesame oil. Garnish with cilantro sprigs, if desired.

Enjoy!